

Mail Merge Outlook with Word
This is a word document that I am sending using the mail merge function in MS Word. The file will be sent using MS Outlook. You can also add images to this document and when you send this document as an email, it will become part of the email. This example will assume you will be using Excel to import the group of email addresses you will be sending the email to. There are 9 steps to completing the mail merge process:
1) Create Word Document that you want to email
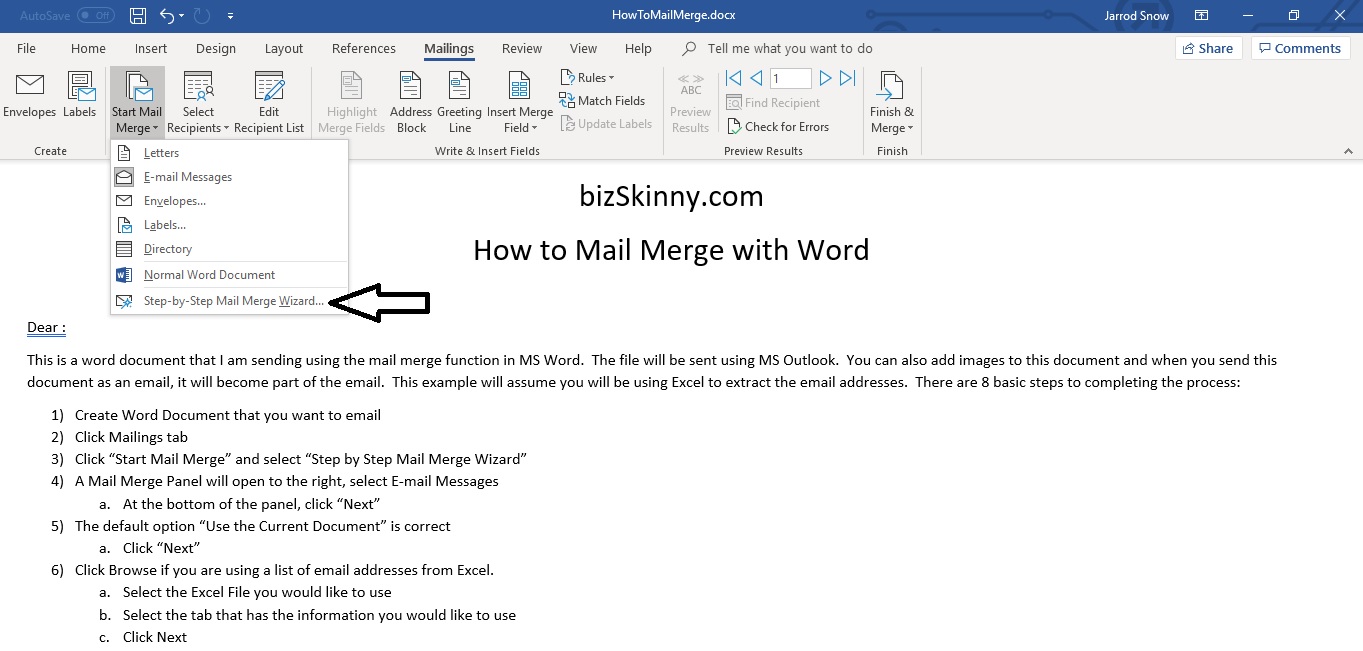
2) Click Mailings tab
3) Click “Start Mail Merge” and select “Step by Step Mail Merge Wizard”
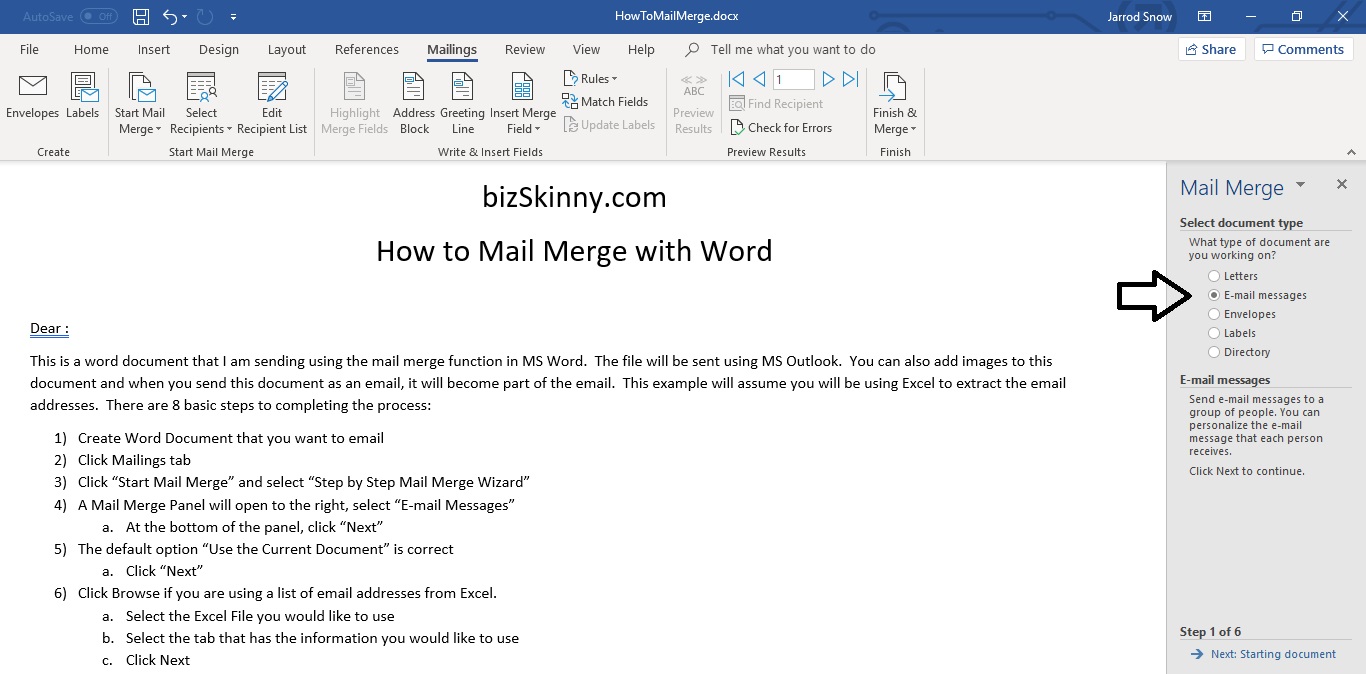
4) A Mail Merge Panel will open to the right, select E-mail Messages
a. At the bottom of the panel, click “Next”
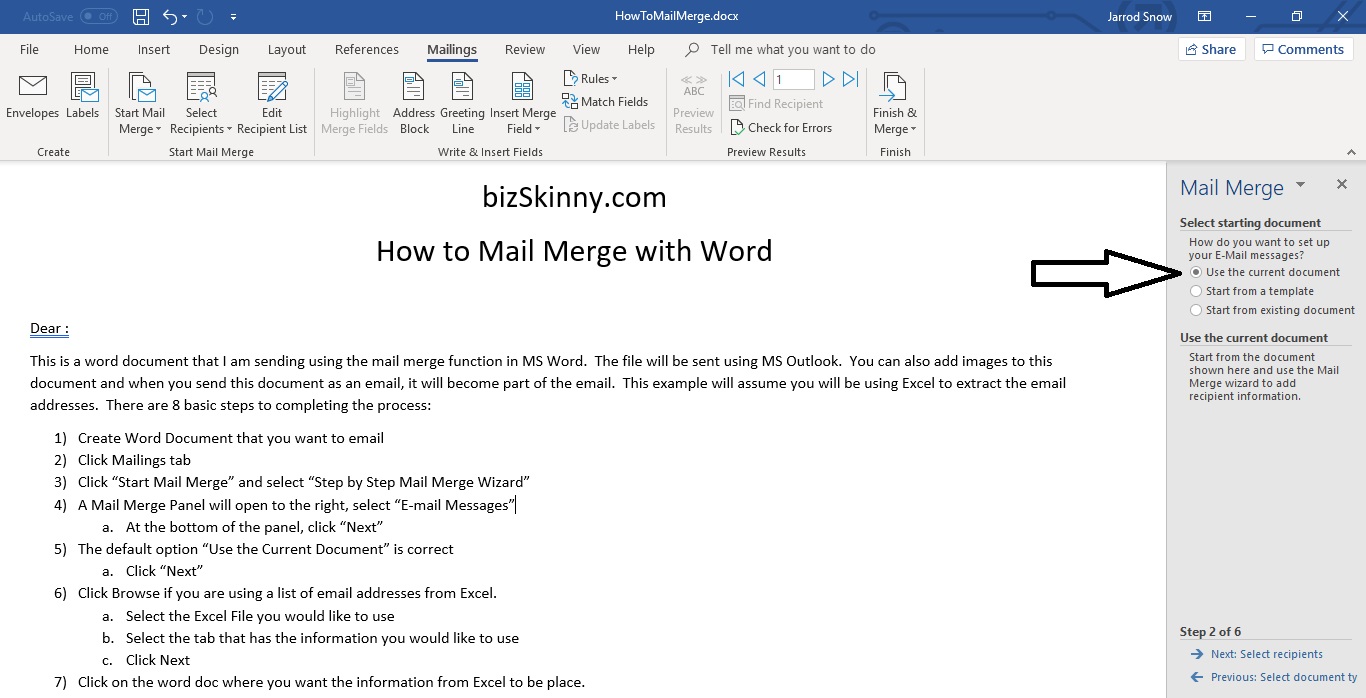
5) The default option “Use the Current Document” is correct
a. Click “Next”
6) Click Browse if you are using a list of email addresses from Excel.
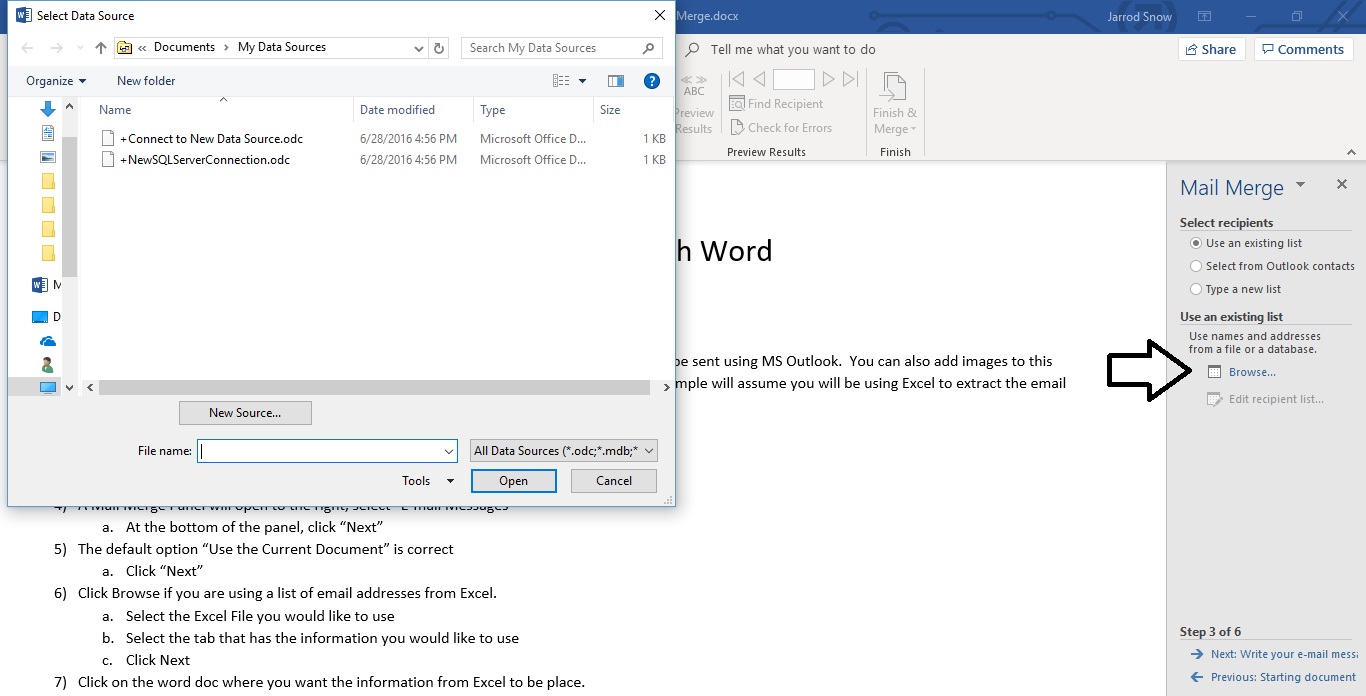
a. Select the Excel File you would like to use
b. Select the tab that has the information you would like to use
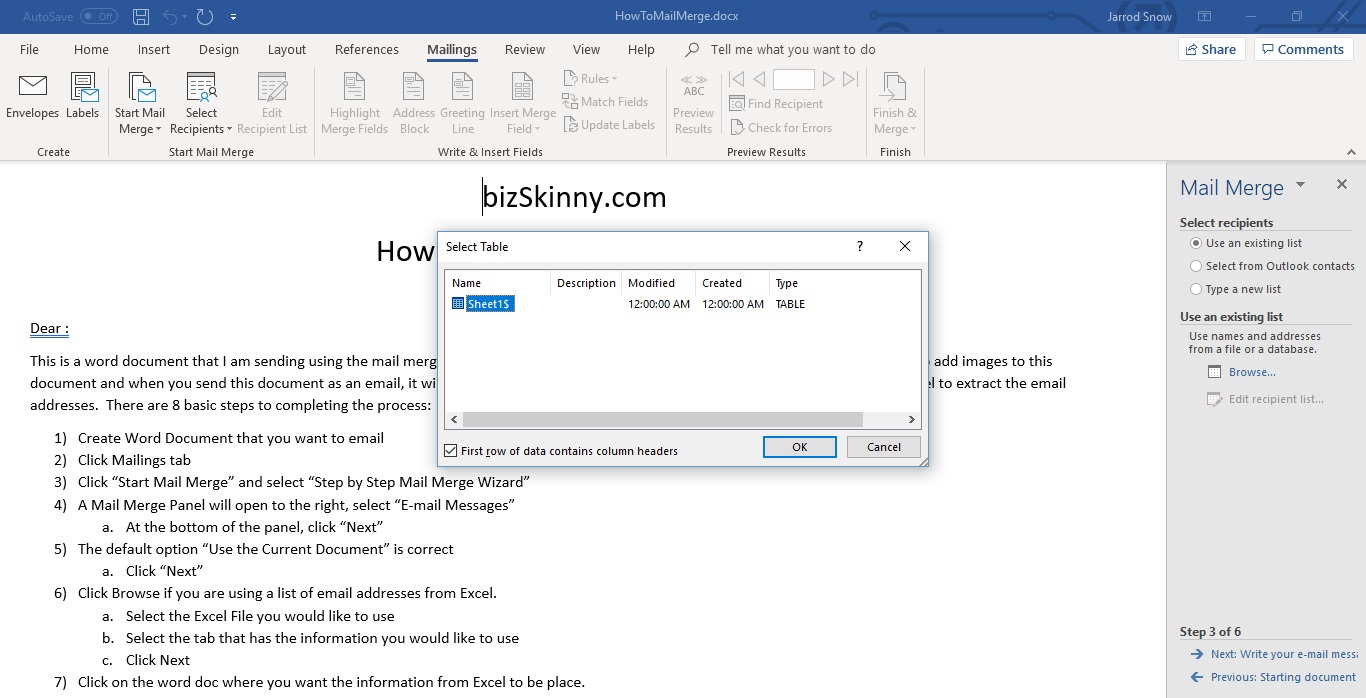
c. Click "Ok" and then Next
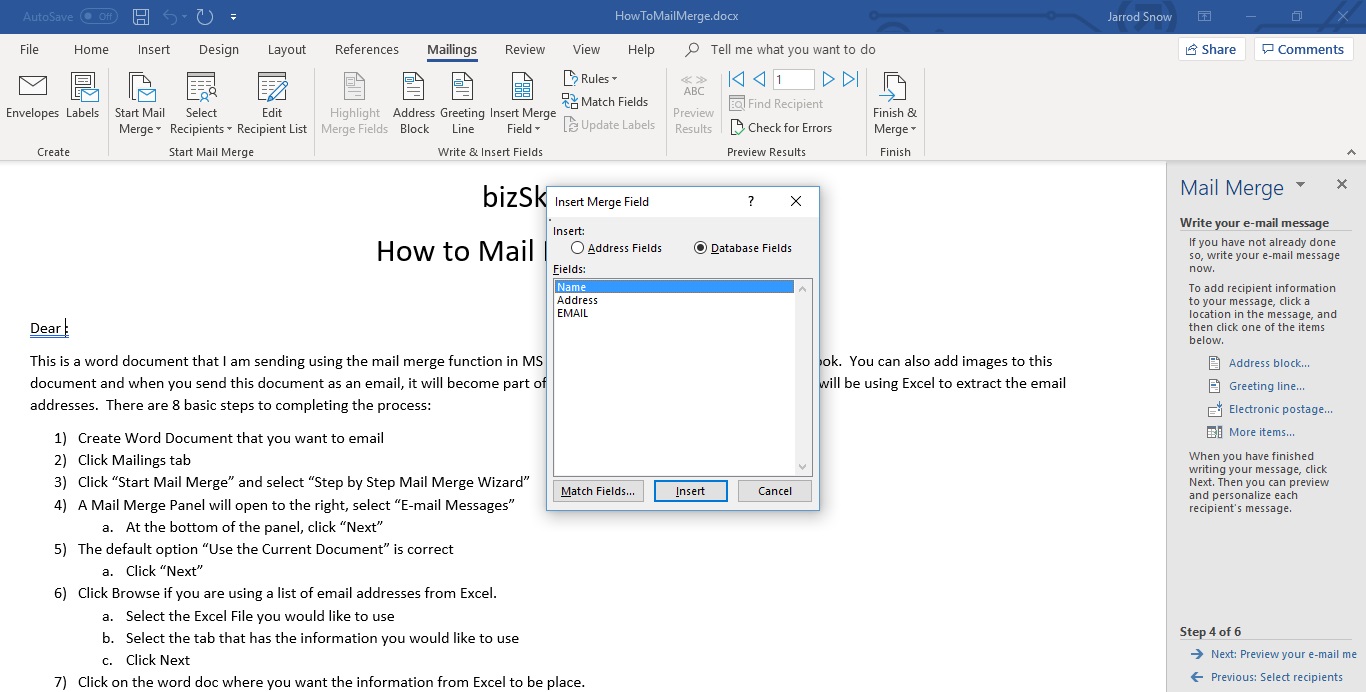
7) Click on the word doc where you want the information from Excel to be place.
a. In this example I will be putting the Name Column information next to “Dear :”
b. Select “More Items” in the Mail Merge panel
c. Select “Name” and click close. You should see <> where the cursor was.
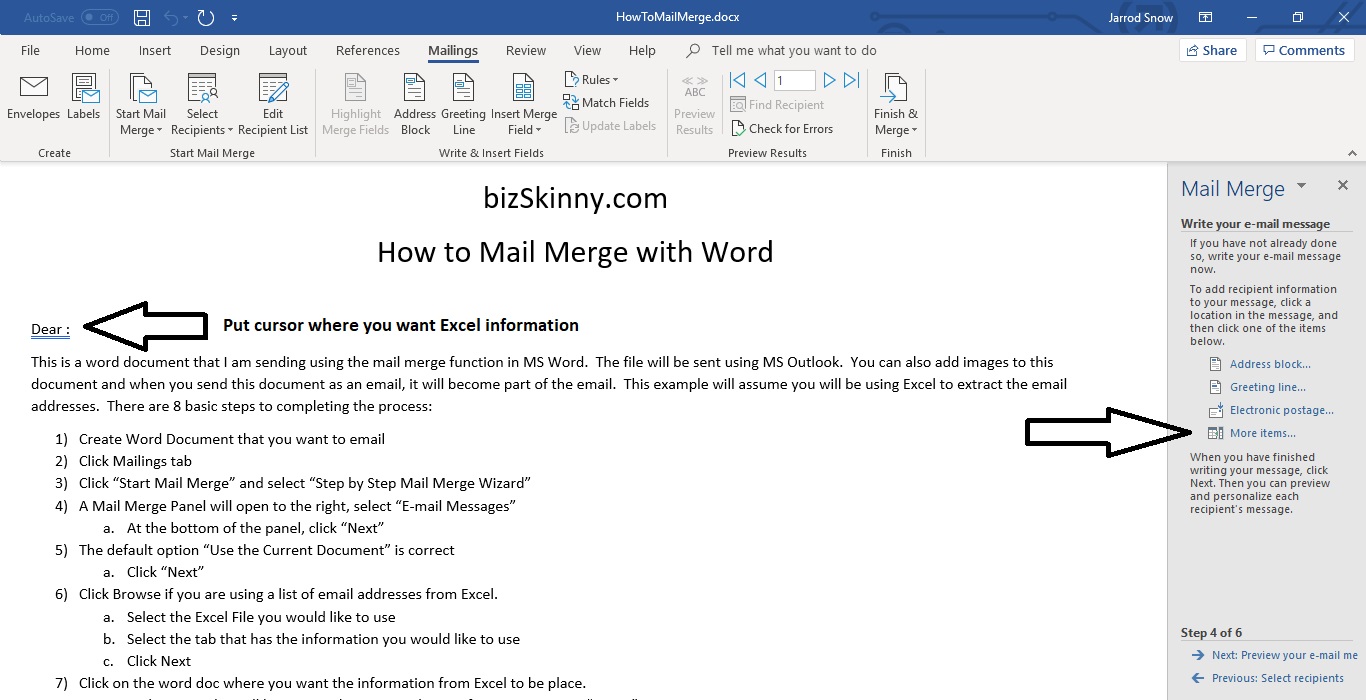
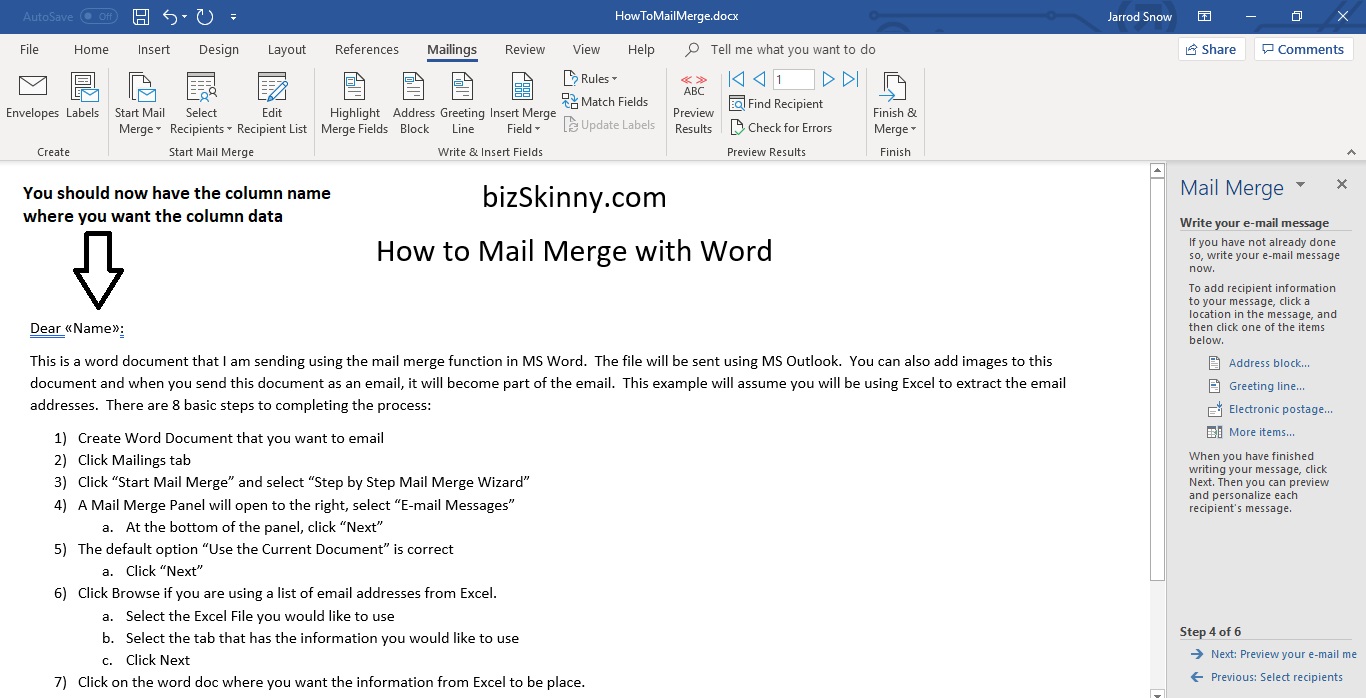
d. Click “Next”
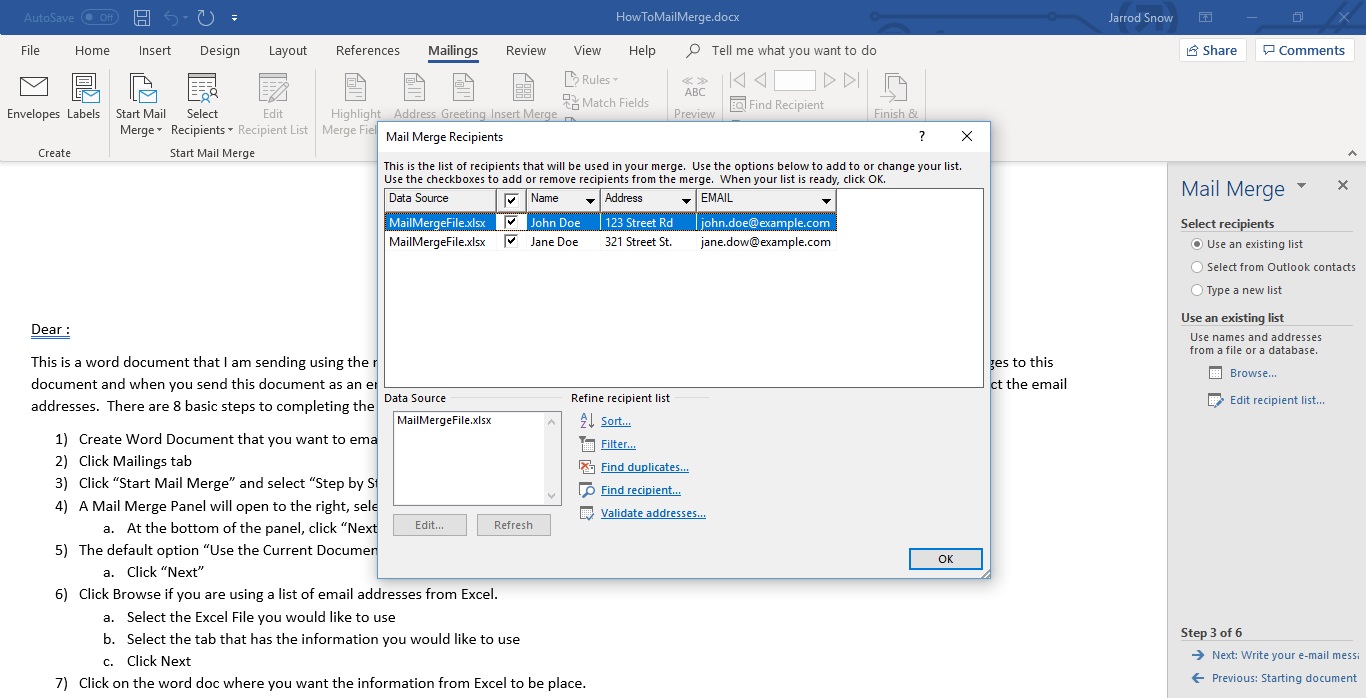
8) As long as your Excel file has the recipients, you should not need to make any changes in Step 5 of this process. – Click “Next”
9) Select “Electronic Mail…”
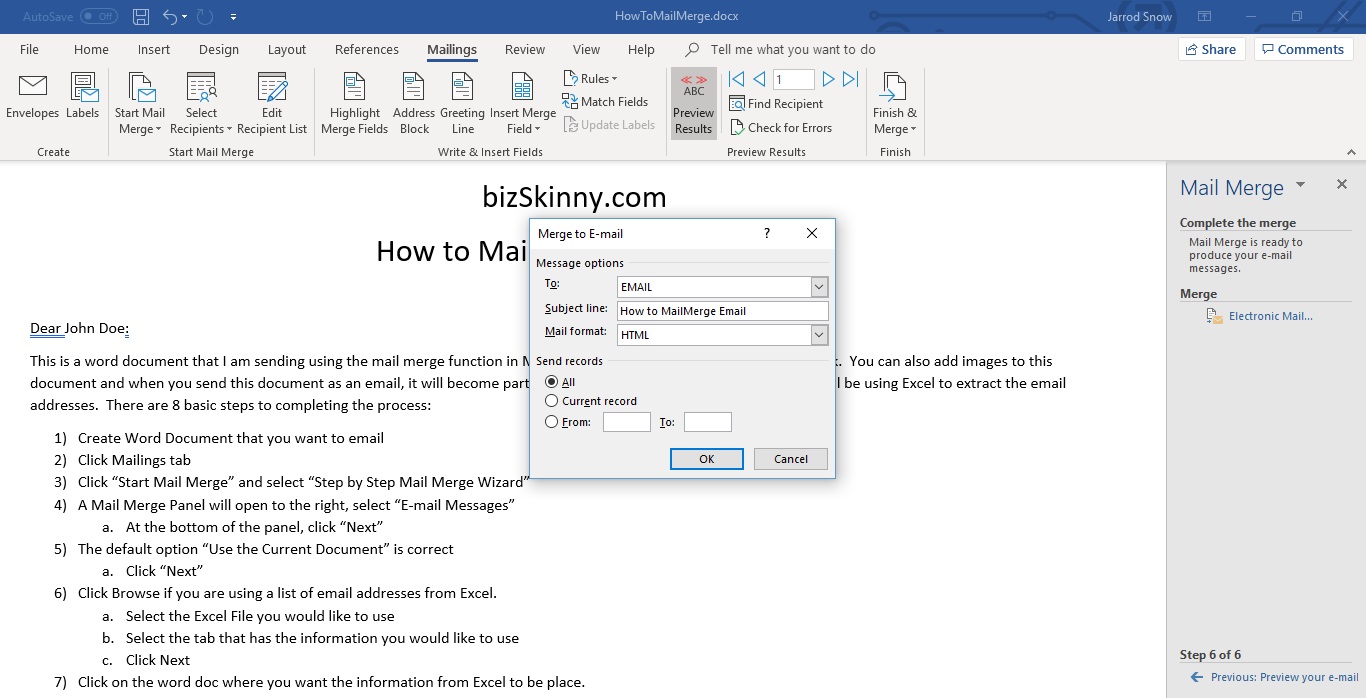
10) You're all done, the Mail Merge process should be taking place. If you look at your Outlook you should see the numbers increasing as Outlook processes the emails.
***Note: If you are using Excel to provide the email addresses, you may want to wait on doing anything in Excel, as it may stop the mail merge process.
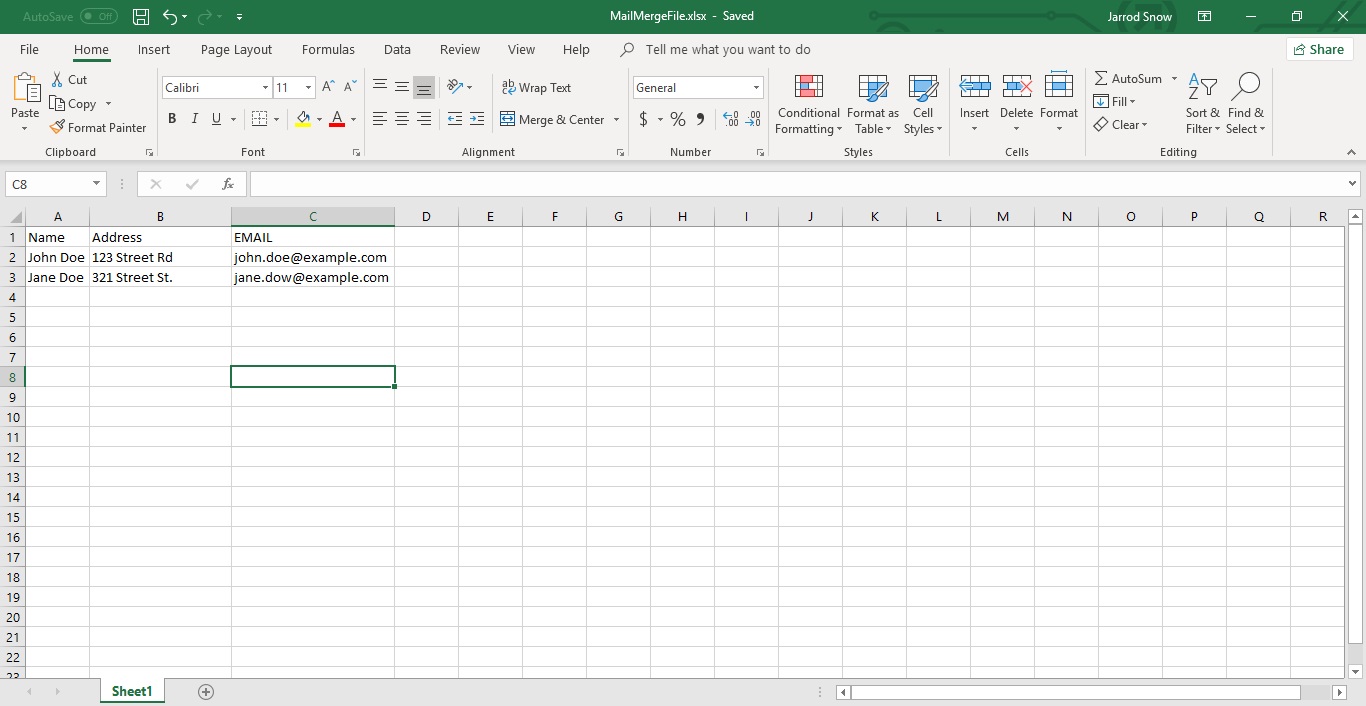
If you're not familiar with how the Excel file should be set up, the following is a simple example of what it could look like. For the below example, I am just using the Name column to insert the name of the person in the email and the Email column so Outlook knows who is receiving the email.
1) Create Word Document that you want to email
2) Click Mailings tab
3) Click “Start Mail Merge” and select “Step by Step Mail Merge Wizard”
4) A Mail Merge Panel will open to the right, select E-mail Messages
a. At the bottom of the panel, click “Next”
5) The default option “Use the Current Document” is correct
a. Click “Next”
6) Click Browse if you are using a list of email addresses from Excel.
a. Select the Excel File you would like to use
b. Select the tab that has the information you would like to use
c. Click "Ok" and then Next
7) Click on the word doc where you want the information from Excel to be place.
a. In this example I will be putting the Name Column information next to “Dear :”
b. Select “More Items” in the Mail Merge panel
c. Select “Name” and click close. You should see <
d. Click “Next”
8) As long as your Excel file has the recipients, you should not need to make any changes in Step 5 of this process. – Click “Next”
9) Select “Electronic Mail…”
10) You're all done, the Mail Merge process should be taking place. If you look at your Outlook you should see the numbers increasing as Outlook processes the emails.
***Note: If you are using Excel to provide the email addresses, you may want to wait on doing anything in Excel, as it may stop the mail merge process.